Efficient Graph-Based Image Segmentationのお勉強
はじめに
画像中の似ているところを見つけてラベリングをする手法があります。いわゆるImage segmentationのことで、Efficient Graph-Based Image Segmentation, 2004.が有名そうなので調べてみました。
アルゴリズム
Union-Find Treeを使うのが特徴的です。aとbが同じグループに属するかを調べる、aとbのグループを併合する、が簡単にできます。プログラミングコンテストチャレンジブックをちらちら見ながら作りました。Segmentationのアルゴリズムはhttp://irohalog.hatenablog.com/entry/2014/10/05/213948が詳しいです。
実装
もともとSalient Object Detection: A Benchmark, 2014.を見ていたらDRFIって手法が良いらしくて、それがEfficient Graph-Based Image Segmentationを使っていたので調べました。10年以上前の論文ですが、今でも通用するようです。
作ったんですが、論文の画像を再現できないので何か間違っているみたいです。何かは分かりません(-_-)

void Segmentation::Run(const std::string filename)
{
  using namespace cv;
  const Mat1b image = imread(filename, 0);
  if (image.empty())
  {
    std::cerr << "Error: No image file available" << std::endl;
    return;
  }
  // Gaussian filter to smooth the image
  cv::GaussianBlur(image, image, cv::Size(5, 5), 0.5);

  const int k = 500;

  std::vector<Edge> edges = MakeEdge(image);
  // 0. Sort Edge, by non-decreasing edge weight
  std::sort(edges.begin(), edges.end(), [](Edge a, Edge b) {return a.weight < b.weight;});
  // 1. Start with a segmentation S0, where each vertex vi is in its own component
  tree_.reset(new UnionFindTree(image.rows, image.cols, k));
  // 2. Repeat step 3 for q=1,...,m
  // 3. Construct Sq given Sq-1
  for (Edge& edge : edges)
  {
    // If vi and vj are in disjoint components of Sq-1 and weight is small
    // compared to the internal difference of both those components, then merge
    CompareMerge(edge);
  }

  // Reduce min components
  for (Edge& edge : edges)
  {
    const double min = 500;
    ReduceMin(edge, min);
  }

  cv::Mat3b label(image.rows, image.cols);
  MakeLabeledImage(edges, label);

  imshow("Input Image", image);
  imshow("Result Image", label);
  cv::imwrite("a.jpg", label);

  cv::waitKey(0);
}
細かいコード
template <typename T>
std::vector<Edge> MakeEdge(const T& image)
{
  std::vector<Edge> edges;

  for (int y = 0; y < image.rows; y++)
  {
    for (int x = 0; x < image.cols; x++)
    {
      if (x < image.cols - 1)
        edges.push_back(Edge(image, x, y, x+1, y));

      if (y < image.rows - 1)
        edges.push_back(Edge(image, x, y, x, y+1));

      if (x < image.cols - 1 && y < image.rows - 1)
        edges.push_back(Edge(image, x, y, x+1, y+1));

      if (x < image.cols - 1 && y > 0)
        edges.push_back(Edge(image, x, y, x+1, y-1));
    }
  }

  return std::move(edges);
}

void Segmentation::CompareMerge(Edge& edge)
{
  int a = tree_->Find(edge.vi);
  int b = tree_->Find(edge.vj);
  if (a == b) return;

  if (edge.weight <= tree_->Threshold(a)
      && edge.weight <= tree_->Threshold(b))
  {
    tree_->Merge(a, b);
    tree_->UpdateThreshold(tree_->Find(a), edge.weight);
  }
}

void Segmentation::ReduceMin(Edge& edge, double min)
{
  int a = tree_->Find(edge.vi);
  int b = tree_->Find(edge.vj);
  if (a == b) return;

  if (tree_->Size(a) < min || tree_->Size(b) < min)
    tree_->Merge(a, b);
}

void Segmentation::MakeLabeledImage(const std::vector<Edge>& edges, cv::Mat3b& label)
{
  std::random_device rd;
  std::mt19937 mt(rd());
  std::uniform_int_distribution<int> random(0, 255);
  std::vector<cv::Vec3b> colors(label.rows*label.cols);
  for (int i = 0; i < colors.size(); i++)
    colors[i] = cv::Vec3b(random(mt), random(mt), random(mt));

  for (int y = 0; y < label.rows; y++)
  {
    for (int x = 0; x < label.cols; x++)
    {
      label(y, x) = colors[tree_->Find(x + label.cols*y)];
    }
  }
}
union-find tree
class UnionFindTree
{
public:
  UnionFindTree(int height, int width, int k)
    : parent_(height*width), rank_(height*width), size_(height*width), threshold_(height*width), k_(k)
  {
    std::iota(parent_.begin(), parent_.end(), 0);
    std::fill(rank_.begin(), rank_.end(), 0);
    std::fill(size_.begin(), size_.end(), 1);
    std::fill(threshold_.begin(), threshold_.end(), k_ / 1.0);
  }

  ~UnionFindTree() {}

  int Find(int x)
  {
    if (parent_[x] == x)
      return x;
    else
      return parent_[x] = Find(parent_[x]);
  }

  void Merge(int x, int y)
  {
    x = Find(x);
    y = Find(y);
    if (x == y) return;

    if (rank_[x] < rank_[y])
    {
      parent_[x] = y;
      size_[y] += size_[x];
    }
    else
    {
      parent_[y] = x;
      size_[x] += size_[y];
      if (rank_[x] == rank_[y]) rank_[x]++;
    }
  }

  bool IsSame(int x, int y)
  {
    return Find(x) == Find(y);
  }

  int Size(int x) const
  {
    return size_[x];
  }

  double Threshold(int x)
  {
    return threshold_[x];
  }

  void UpdateThreshold(int a, double weight)
  {
    threshold_[a] = weight + (double)k_ / Size(a);
  }

private:
  std::vector<int> parent_;
  std::vector<int> rank_;
  std::vector<int> size_;
  std::vector<double> threshold_;
  int k_;
};
Edge
class Edge
{
public:
	template <typename T>
	Edge(const T& image, int x1, int y1, int x2, int y2)
	{
		vi = x1 + image.cols * y1;
		vj = x2 + image.cols * y2;
		weight = CalcWeight(image, x1, y1, x2, y2);
	}

	int vi;
	int vj;
	double weight;

private:
	static double CalcWeight(const cv::Mat1b& image, int x1, int y1, int x2, int y2)
	{
		return std::abs((double)image(y1, x1) - image(y2, x2));
	}

	static double CalcWeight(const cv::Mat3b& image, int x1, int y1, int x2, int y2)
	{
		double w = 0.0;
		for (int i = 0; i < 3; i++)
		{
			w += std::pow((double)image(y1, x1)[i] - image(y2, x2)[i], 2.0);
		}

		return sqrt(w);
	}
};
透過ウィンドウで画像処理する
はじめに
画像処理のプログラムを書くときには、テスト用に画像や動画を使用します。これを準備するのは面倒なので、YouTubeや画像検索の結果画面を処理対象にできたら便利だなと思うことがありました。今回は透過するウィンドウをつくり、その領域で画像処理をしてみます。そうすることでWebカメラでデスクトップを撮影するよりも、きれいに動画像処理が可能となります。
透過ウィンドウの作成
ウィンドウ上の部品を透明にして奥が見えるにして、その部分を画像処理の対象にします。はじめにPanelを貼り付けて適当な色にします。その後、その色を透過として設定することで実現できました。
winforms - C# transparent background for window form - Stack Overflow
public Form1()
{
  InitializeComponent();

  this.panel1.BackColor = Color.Magenta;
  this.TransparencyKey = Color.Magenta;
}

それでPanelをキャプチャしたら良いかと思ったんですが、うまくいきませんでした。Magenta一色のbmpが生成されます。
var bitmap = new Bitmap(this.panel1.Width, this.panel1.Height);
this.panel1.DrawToBitmap(bitmap, new Rectangle(0, 0, this.panel1.Width, this.panel1.Height));
bitmap.Save("capture.bmp");
別の方法を調べると、スクリーンキャプチャーをするCopyFromScreenがあったのでこれを使います。
c# - Capture the Screen into a Bitmap - Stack Overflow
同じ場所に結果を表示すると、その結果をキャプチャすることになるので何も変化しなくなりました。思ってたのと違いますが、妥協案で隣に結果表示用のpictureBox2をつけました。Overlapしてる部分の見えないところの画像が撮れると良いんですけどね。
とりあえずYouTubeで動画像処理ができそうです。

using (var bitmap = new Bitmap(pictureBox1.Width, pictureBox1.Height))
{
  using (var g = Graphics.FromImage(bitmap))
  using (var g2 = pictureBox2.CreateGraphics())
  {
    Point p = PointToScreen(pictureBox1.Location);
    g.CopyFromScreen(p.X, p.Y, 0, 0, pictureBox1.Size, CopyPixelOperation.SourceCopy);

    g2.DrawImage(Binarize(bitmap), 0, 0, bitmap.Width, bitmap.Height);
  }
}
動体検出を軽くする(AAS, CVPR '12)
はじめに
動体検出を使用して物体の検出を行うことがあります。特に最近のカメラは高画素であり、処理が重くなります。そこで、画像の全画素で処理を行わず、物体がありそうなところだけで処理を行う方法が考えられます。
アルゴリズム
ちょっと前の論文ですが、動体検出(背景除去)の高速化を目指した論文がありました。
Active Attentional Sampling for Speed-up of Background Subtraction, CVPR 2012.
これは過去の検出結果から、物体がありそうな確率マップ(probability map)を生成して、確率が高いところで検出処理を行おうとしたものです。それだと新しい侵入物に対応できないので、ランダムに数割程度の画素に対して検出処理をします。下の図は検出結果、probability map、maskを並べたものです。maskの白い部分が重い動体検出処理を行う画素で、黒の部分は処理しないため、全体としての処理は軽くなります。

maskの生成にはいくつかのpropertyを考慮します。
foreground probability map
以上三つをまとめます。

この結果が最初の画像まんなかのprobmapです。
randomly scatter
probability mapは確率のmapで、maskではありません。ここから、実際に使用するmaskを生成していきます。

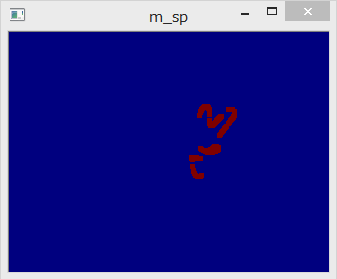
maskはM_RSとM_SEIとM_SPのORで計算します。
M_RSはrandomly scatterを表し、一定の割合で画像全体に検出点を作ります。
実装はランダムに点を選んでM_RS(i)=1にします。ちょっとしたテクニックですが、前のフレームでrandomly scatterした点が動体だと判定されたら、次のフレームでもM_RS(i)=1にしてます。

まとめ
動体検出(背景除去)を高速化するためのアルゴリズムを調べました。全部探索する必要がないタスクは他にもありそうなので、このアルゴリズムを流用できるかもしれません。
OpenCVで実装したものを一部だけ載せておきます。
void AASampling::process(const cv::Mat1b& d_t)
{
	d_ = 0.0f + d_t;

	// temporal property
	m_t_ = (1.0f - ALPHA_T) * m_t_ + ALPHA_T * d_;

	// spatial property
	makeSpatialMatrix(s_);
	m_s_ = (1.0f - ALPHA_S) * m_s_ + ALPHA_S * s_;

	// frequency property
	makeFrequencyMatrix(f_);
	m_f_ = (1.0f - ALPHA_F) * m_f_ + ALPHA_F * f_;

	// foreground probability map
	p_fg_ = m_t_.mul(m_s_).mul(1.0f - m_f_);

	randomlyScattered(m_rs_);
	spatiallyExpanding(m_sei_);
	surprisePixel(m_sp_);

	// active sampling mask generation
	maskGeneration(result_mask_);

	pre_p_fg_ = p_fg_.clone();
	pre_pre_d_ = pre_d_.clone();
	pre_d_ = d_.clone();
}
パワポのスライド上でプログラムを動かす
はじめに
パワーポイントには.NET Frameworkのプログラムを貼り付ける機能があります。これを用いることで、よりインタラクティブな発表を行うことができます。
つくり方
前回の記事でExcelから.NET Frameworkの自作関数を呼び出す方法を調べました。COMと呼ばれるインターフェースにより、ExcelのVBAからメソッドを見えるようにしています。
今回は.NET Frameworkでつくった自作Formをパワポから参照できるようにして、スライド上に自作のプログラムを貼り付けます。前回は一つの関数だけなので簡単にできましたが、Formとなると様々なイベントなどをCOMで見えるようにする必要があり難しそうです。調べてみるとMicrosoftがサンプルを公開していたので、これを利用したいと思います。
Windows 8 C# ActiveX control (CSActiveX) sample in C#, XML for Visual Studio 2008
顔検出
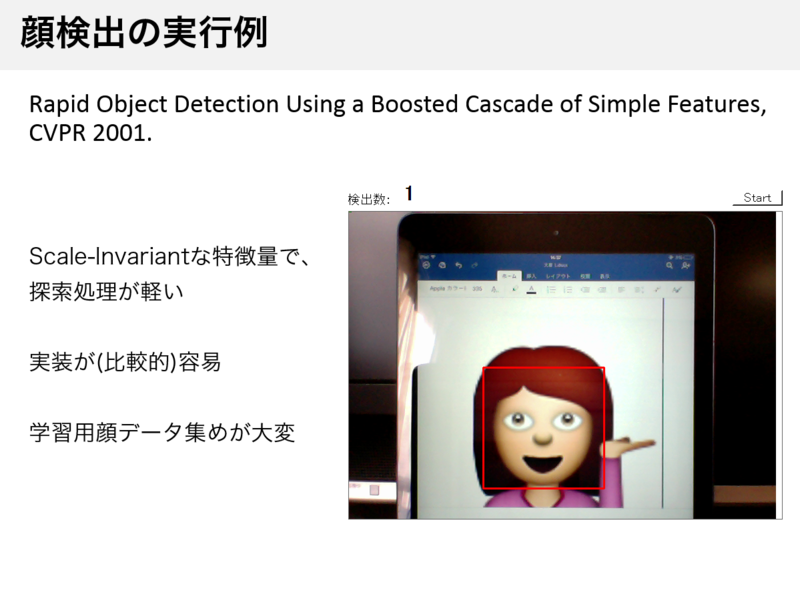
前回はUSBカメラ画像の表示をしたので、ちょっと変えて顔検出結果をリアルタイムにパワポ上に表示させてみます。Haar-like/AdaBoostの顔検出だとOpenCVで実装済みなので、試してみましょう。
Microsoftのサンプルにユーザーコントロールが入っているのでそれを顔検出用に変更します。
StartボタンとPictureBoxとラベルがあります。
実装は分かりやすくするため、StartボタンのClickイベントに書いていきます。
Cpp.FaceDetection _facedetection = new Cpp.FaceDetection();
private void startButton1_Click(object sender, EventArgs e)
{
  Task.Factory.StartNew(() =>
  {
    for (; ; )
    {
      // 検出結果画像
      this.pictureBox1.Image = _facedetection.Run();
      // 検出数
      this.label1.Text = string.Format("{0}", _facedetection.num_detected);
    }
  });
}
OpenCVの顔検出はC++のFaceDetectionクラスに実装しました。Run()を呼ぶとBitmapが返ってきます。
プロジェクトを管理者権限でビルドすると、パワポから参照できるようになっています。開発タブのコントロール選択から選べるはずです。
パワポの発表画面を開いて、Startボタンを押すと検出がリアルタイムで行われるようになりました。顔は自分のだと恥ずかしいので、絵文字にしてます。(ほんとは検出しちゃだめなんですけどね)

Consoleの表示
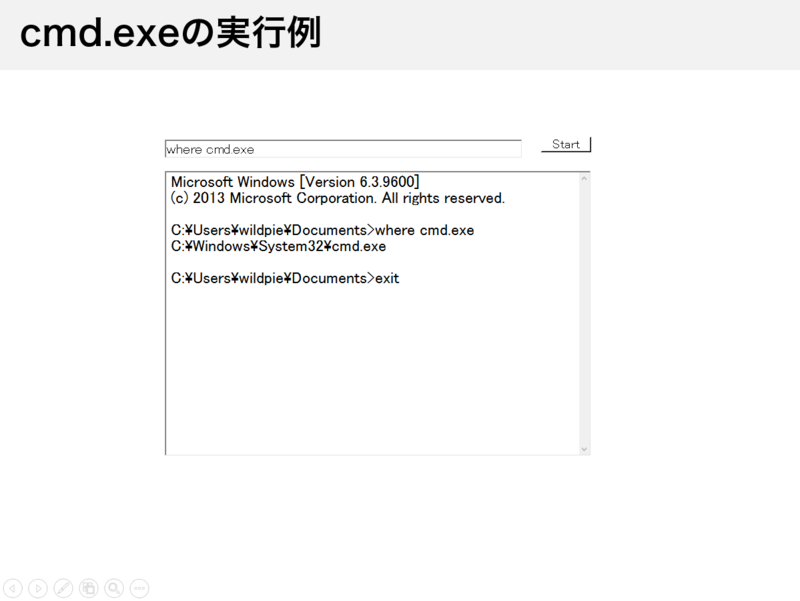
スクリプト言語系のConferenceに行くと、発表中にプログラムを動かす光景をよく見ます。ここではパワポ上でcmd.exeを動かしてみます。
(参考:http://uchukamen.com/Programming1/Process/)
パワポ上でPythonが動くとおもしろいかなと思って試したんですが、このリンクの方法では動きませんでした。


